Maintaining Saltwater Fishing Gear
By: Matt Stone
A couple of days have passed since your last saltwater fishing excursion. Wandering among your angling arsenal reminiscing about epic topwater blowups, you lovingly grab your favorite rod and reel setup, one that landed giants only 48 hours ago thanks to a combination of rod-enhanced stopping power and a buttery smooth drag. Today though, a wistful turn of the handle stops you dead: why is it grinding and stiff? Why does it sound like there's a small rodent trapped somewhere inside the gears? You panic. Money down the drain, upcoming trips thrown into jeopardy, those recent big fish memories vanish in a flash like a mosquito hit by a semi-truck. Reality sets in: My reel is ruined. You are left with sadness, and a simple question: How could this happen?
Well, most of us who've fished the salt for any period of time have had the unfortunate experience (either due to absentmindedness, ignorance, or maybe a bit of laziness) of losing a reel, rod, set of pliers, or some other beloved piece of gear due to saltwater oxidation and corrosion. There is no sugarcoating- it stinks! Saltwater has unstoppable impacts- it just does. There is no way to 100% prevent saltwater from working its way into and onto your gear over time. Luckily, there are some very simple ways to keep not only your rods and reels, but also electronics and even kayak, mostly free from the impacts of saltwater fishing. Let's take a look at these easy and inexpensive methods for ensuring that the gear you spent your hard-earned money on lasts as long as possible and is in excellent working condition for the duration of its lifetime.
EXTENDING THE LIFE OF RODS AND REELS
Not in the habit of keeping mental tabs on the exposure that your rods and reels get to saltwater? Well, today's the day to start noticing. Over time, and occasionally all at once, saltwater can make its way into your stuff and cause irrecoverable damage. The best way to keep your rods and reels away from the saltwater is to not go fishing at all...clearly not an option! However, storing your gear somewhere on the boat or kayak where it has minimal exposure to spray and splashes is a great first step.
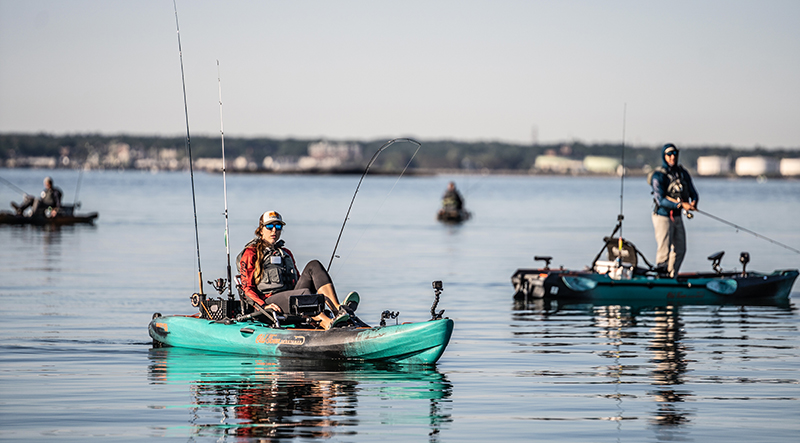
I like my setups to be stored vertically on my kayak so they are as high above water level as I can safely get them. I also keep them right behind me so they don't interfere with casting, fighting, or landing a fish. There are horizontal rod holders which attach to kayak gear tracks, but I'd recommend against storing your rods horizontally near the water's surface unless fresh water is your destination. Storing setups near the surface means that one wave or boat wake can cover thousands of dollars of rods and reels in saltwater. If you don't have extra fresh water available to rinse it, those rods and reels might then sit for 3, 4, 5, or more hours, enduring the effects of that one wave and the harmful saltwater exposure that comes with it. This probably won't cause an issue the first time, but if it becomes habitual there will likely be trouble. This leads to one habit I'd recommend adopting- keep an extra bottle of fresh water on your kayak for rinsing gear if it accidentally dunks or gets splashed while out on the water. A quick rinse could save you a lot of anguish. When hitting the salt, I am also never without a clean, dry towel. It comes in handy for many things, but helping get saltwater off your gear is one of its most important uses.
When you return from saltwater fishing, always, always, always rinse your rods and reels. This doesn't mean just the reel- rinse the entire rod, top to bottom. Most saltwater grade gear is made with corrosion-resistant material, but that doesn't mean it entirely prevents corrosion. My first step upon returning home is to lay out my rods and reels (and my kayak for that matter) and spray them all top to bottom with the hose. A quick once-over with a dry towel and storage out of the elements completes the post-fishing process.
Unsurprisingly, you should also practice the routine maintenance of taking apart and cleaning and lubricating your reels. Whether they cost you $50 or $500, this is like a car's oil change: it flat out helps. If you're not comfortable with tearing down a reel to clean and lube it, there are plenty of tackle shops that can either do this on sight or send your gear to the pros for cleaning. It's always worth the price.
KEEPING YOUR KAYAK SAFE FROM SUN AND SALT
Let's start from the bottom up with your kayak: get a good cart. Kayak fishing, especially in saltwater, means you might be launching from barnacle-covered, rocky, sandy, or otherwise hard to reach places, and a kayak cart that can handle all of these elements is a non-negotiable in my eyes. If you've never had a good kayak cart, one day of use will make you a believer. I can't recommend the Malone series of kayak carts enough. Particularly, for those who fish in large angler's kayaks or carry lots of gear, the Malone Heavy Loads Cart with balloon wheels is absolutely clutch. It'll save you time, energy, and extend the life of your kayak. If you have decals on the sides of your yak, an added bonus of the cart is that it prevents you from having to tilt the kayak onto its side for lifting, which could scratch and tear those nice decals.
The number one factor when it comes to maintaining your beloved vessel is the sun and its UV rays. With repeated exposure, the sun can break down the polyethylene that your kayak is constructed from, making it more susceptible to damage or fading. This is especially true if you store your kayak outdoors where it routinely spends hours in direct sunlight. Now, obviously exposing your kayak to hours of sunlight is going to happen when you're out there exploring the saltwater- it's unavoidable. So, in order to protect it from those long hours in the sun, I would strongly recommend spending a few bucks to buy some 303 UV Protectant Spray. It can cost as little as $25, and will help keep the sun's harmful UV rays at bay. Additionally, Paul from Hydra Concepts USA recommends spraying electrical connections, like those on your fish finder, with either Boeshield T-9 or Quicksilver Corrosion Guard. This simple and inexpensive step can protect thousands of dollars worth of your electrical equipment for weeks on end. For those of you that have motorized kayaks like the Old Town Sportsman AutoPilot, be sure to apply a small amount of dielectric grease to the connections to help keep them clean and secure.
The steps for after-water kayak care are the same as for your rods and reels: Rinse it with a hose top to bottom, dry with a clean towel, and store your yak out of the sun. For those with pedal and motorized kayaks, it can also be helpful to dunk your drive in a bucket of clean water so that all of the nooks and crannies are rinsed thoroughly. At the very least, spray down the drive along with the rest of your kayak. Every little bit helps.
As time goes on, keep an eye out for new or out of the ordinary wobbles, knocks, noises, or wiggles in your kayak. These are likely the result of regular use and are simple fixes if caught early. When things have already gone wrong your maintenance becomes reactive, so when it comes to protecting your kayak, proactivity is the name of the game! For more kayak maintenance tips, check out our blog.

PROTECTING GEAR, TACKLE, AND MISCELLANEOUS ITEMS
Lures, pliers, lip grips, scissors, knives, and whatever else you bring along on a trip to fish the salt should all be rinsed after you get home. Every now and then I also apply WD-40 to my pliers and scissors to keep them working smoothly. After bottom fishing, I like to give my bucktails a bath and dry them on a clean towel. Additionally, all of my plugs get cleaned after each trip. Some of them cost upwards of $20 each, so a quick rinse is well worth it. If you have waterproof tackle boxes you can probably avoid cleaning everything, but the general rule is, if you used a lure in the salt that day, it should be rinsed. Lastly, I wipe down my Humminbird Helix 7 with a damp rag and then dry it off before storing.
My cleaning process involves putting pliers, scissors, lip grips, and all used lures on the lawn when I get home. Then, all at once, the yak, PDL drive, rods, reels, and the rest of the gear gets a nice bath with the hose. Are you sensing a pattern here? – Taking two minutes to rinse and dry your stuff can save you hundreds if not thousands of dollars and quite a few headaches!
I'll say it again: The golden rule for extending the life of your saltwater gear is to be proactive, not reactive. If you wait until something went wrong, it is likely already too late. Whenever you get home from a day on the water, treat all of your gear like it is new and pretend it all got soaked with sea spray! Once you get a system down, this whole process becomes a matter of an extra 3-5 minutes to keep your stuff working like new! You'll save money, get more hours on the water, and catch more fish. That's a trifecta of awesome and well worth your time!


