PDL Drive Information
TRANSPORTING, INSTALLING, AND OPERATING THE PDL DRIVE
- The PDL drive should not be mounted into the boat during transportation. Please secure the drive elsewhere in your vehicle for transportation to/from the water.
- Check if the thwart thumbscrews are secure before placing drive in boat.
- Check if propeller is seated to the prop pin and that the prop nut is tight.
- Three lock down knobs secure the PDL drive unit into the boat. These are designed to be sacrificial parts should a forceful impact with a submerged rock, root, or tree occur. The plastic knobs may break but will lessen the impact felt by the drive, watercraft and occupant. Replacement lock knob kits are available on the Old Town website.
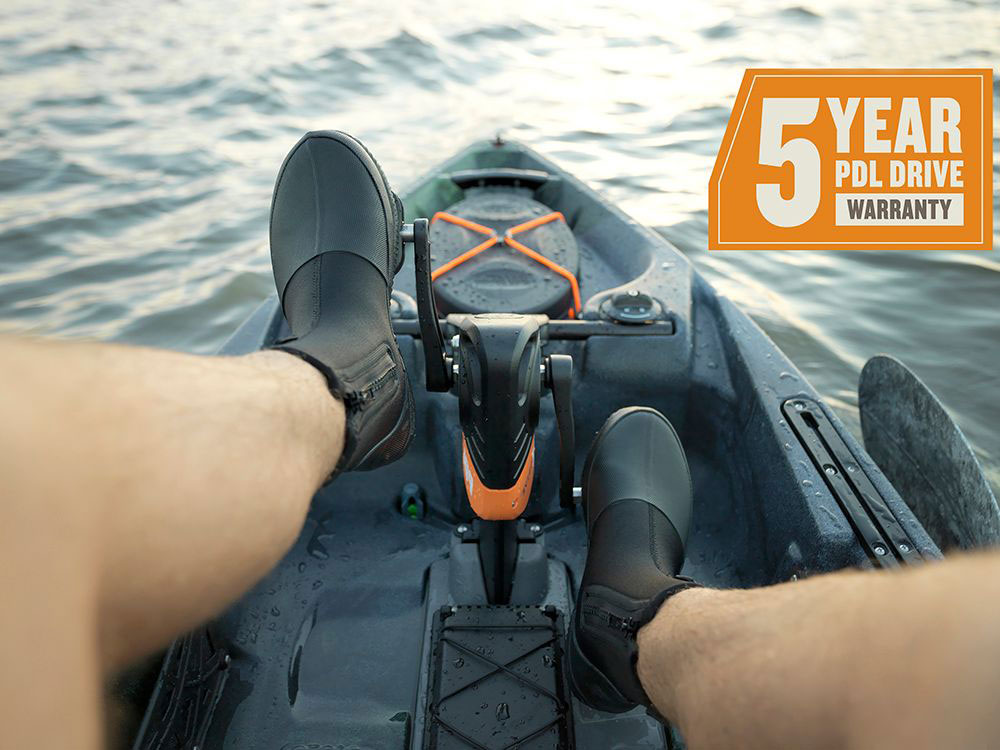
- The award-winning PDL Drive is the easiest and most reliable pedal drive on the market backed by a 5-year warranty.
SETTING UP THE PDL DRIVE
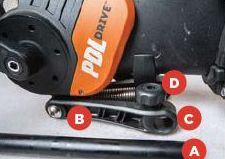
- Locate the drive thwart (A) on the boat hull at the front end of the cockpit. It will be secured to the boat by the thwart lockdown knobs. Turn knobs to the neutral position and remove the thwart.
- Place pedal drive unit on a flat work surface so that the propeller is facing upward and the drive unit is resting on the pedal pivot (B), a wishbone-shaped bracket with a large spring attached. On each side of the pedal pivot will be a 1” opening (C) with large thumbscrews (D) adjacent. Loosen these thumbscrews, but do not remove. Insert the drive thwart into one of these openings and push it through until exiting the other opening. Center the thwart on the drive using the arrow indicators on the thwart, but do not tighten the thumbscrews yet. You may have to place your finger into the opening and align locking tab to allow thwart to slide through. Set drive unit near the boat hull.
- Place the thwart drive assembly into the thwart channel. Lock the two knobs to keep the thwart in place. With the drive clamped into the holder, center the drive in the opening so the gap located on each side of the drive clamp is equal distance to the hull. This is the parked position of the console.
- Before tightening the thwart thumbscrews, make sure the console is centered in the opening. Using the black handle on the console, raise, rotate, and lower the drive console into the deck opening. This is the operating position. Turn the console locking knob to lock the console down. Release any pressure that may be built up on the thwart by centering the drive unit on the thwart. Now, tighten the thwart thumbscrews, being careful to keep the bolt heads recessed into their openings.
MAINTENANCE
- The PDL drive is designed to be low-maintenance. Any drivetrain issues should be addressed by Old Town customer service.
- Rinse unit with freshwater after use to remove sediment, vegetation, and/or salt water. Take care to remove all vegetation and other debris around the prop and skeg to avoid spreading harmful aquatic plant species from one body of water to another.
- If there is a decrease in performance or the pedal drive becomes harder to pedal, remove the prop and check for tangled lines around the prop shaft.
- If propeller is nicked or damaged, a new prop kit can be acquired from your local Old Town dealer or on the Old Town Watercraft website.
- The rudder cord may loosen over time. To tighten cord, remove cap with a knife or flat head screw driver on rudder deployment lever. Access the excess rudder cord and tighten within handle housing by loosening screws and pulling cable to desired tautness. Make sure to loop cord around screw clockwise. Tighten screws and store excess cable within housing and replace cap on lever.
- Replacement parts are available by calling Old Town Watercraft website or by calling Old Town customer service at 800-343-1555.
PROPELLER PIN REPLACEMENT
- We recommend replacing your propeller pin on a level, dry surface. While the PDL drive unit is lying on its back with the propeller facing towards the sky, securing the prop, use the other hand to try and spin prop with foot pedal. If prop bolt/nut is spinning but prop is not, the pin is damaged and needs to be replaced. If prop bolt does not spin, there is internal damage and you should contact a customer service representative at Old Town.
- If the pin is damaged, remove the prop lock bolt/nut. Hold foot pedal and turn counter clockwise direction. Remove nut and washer.
- Pry prop by pulling up on both ends with thumbs in the middle pushing prop shaft. Remove the broken pin and dispose of properly.
- Slide new pin into hole, centering in shaft with pin perpendicular to the drive. This will make it easier to line up pin with slot in prop.
- Slide prop on shaft parallel to the drive and push into place. You should feel it “pop” into the pin slot in the prop, signaling that it is properly seated.
- Replace washer and lock nut. CAUTION: Anytime a stainless bolt to nut connection is made there is a chance of galling (the two pieces lock together). To eliminate this, lubricate the threads with anti-sieze, Teflon Tape, or candle wax.
- Tighten in a clockwise direction until nut is flush with shaft head. Alternately push on each wing of prop. If prop feels loose, tighten nut 1/4 turn. Repeat until prop is tight.
- We recommend keeping an extra prop, prop pins, washers, and nuts on hand while on the water. Purchase replacement prop pins and prop kits on the Old Town Watercraft website.
CAUTION: Over-tightening may damage pin.


