Predator XL And The Ultimate Kayak Fishing Rig
By Dr. Jason Halfen

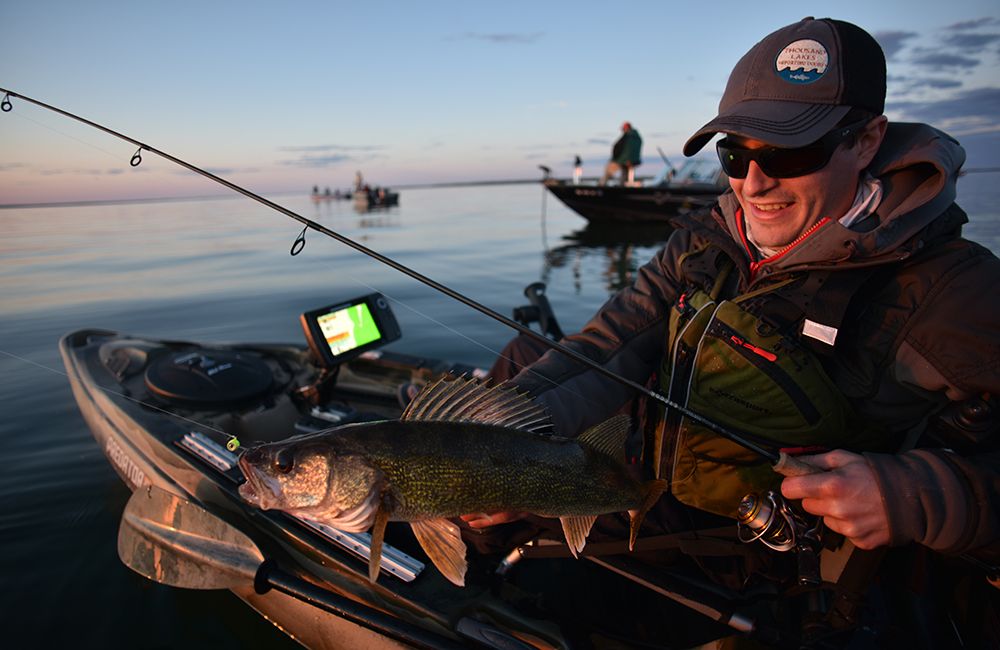
From its interchangeable XL Consoles, to its innovative Element seating system, to its dazzling array of integrated conveniences for the multi-species angler, the Old Town Predator XL Minn Kota is truly designed to be the Ultimate Fishing Machine. Complementing these standard features is our ability to customize the Predator XL Minn Kota with a broad array of accessories that are typically reserved for much larger, significantly heavier, traditional fishing boats; indeed, the Predator XL Minn Kota truly has “rig-ability”. In this article, I’ll demonstrate the ease with which the boat can be customized by rigging it with a sonar/GPS combo, so you can find and catch more fish.
Modern marine electronics are at the heart of every Predator XL Minn Kota adventure, from a smallmouth-infested northern river to a southern bayou teeming with trophy redfish. Contemporary sonar/GPS combos are designed to rapidly and easily identify structure and fish, and to help you navigate safely to and from the fishing grounds. The Humminbird HELIX 7 SI GPS provides these key capabilities, while remaining conscious of the specific constraints of the small boat angler: space and power. The HELIX 7 maintains a small footprint with a minimum number of wires and cables that must be installed in the boat, and its power draw of 800 mA ensures that you can enjoy extended fishing adventures without depleting your fish finder’s power source.
The Old Town Predator XL Minn Kota's thoughtfully-designed Minn Kota and Utility consoles are both “fish finder-ready” which makes the Humminbird HELIX 7 installation quick and easy. The entire process can be completed using basic hand tools, and requires only a minimal time investment that won’t get in the way of your next adventure. While the process described herein is specific to the Minn Kota console, it is identical in every respect to the steps we would use for the Utility console. For simplicity, I will break the electronics rigging sequence into three steps, in which we install (1) the transducer, then (2) the power supply, and finally (3) the HELIX 7 unit with its vibrant, high-contrast display.
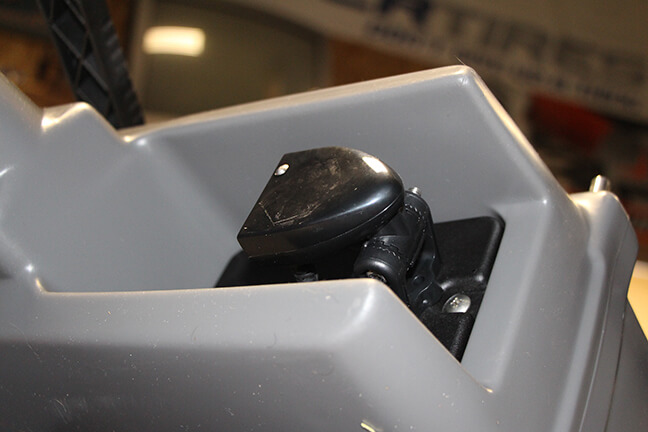
Let’s begin with the Humminbird HELIX 7’s dual beam transducer. We will install the transducer without putting a single screw or hole into the hull of the boat, by taking advantage of the custom-designed and strategically-placed transducer mounting plate found on the bottom of the Minn Kota console. Mounting the transducer to this plate allows the transducer to sit safely within its own protective pocket in the console, so your adventures into stump-filled or boulder-laden waters can take place without worrying about transducer damage. Install the transducer as far forward on this mounting plate as feasible, so that the sonar beam produced by the transducer is not obstructed by the Minn Kota motor’s lower unit. Not only does the plate provide for a secure platform for the transducer, but it also caps a rigging channel that allows us to pass the transducer cable topside, without putting a hole in the Predator XL Minn Kota's hull. Excess transducer cable can be coiled and stored in this rigging channel, ensuring a clean installation that eliminates loose cables draped throughout the boat.

Transducers installed on the Minn Kota XL console sit within their own protective pocket.
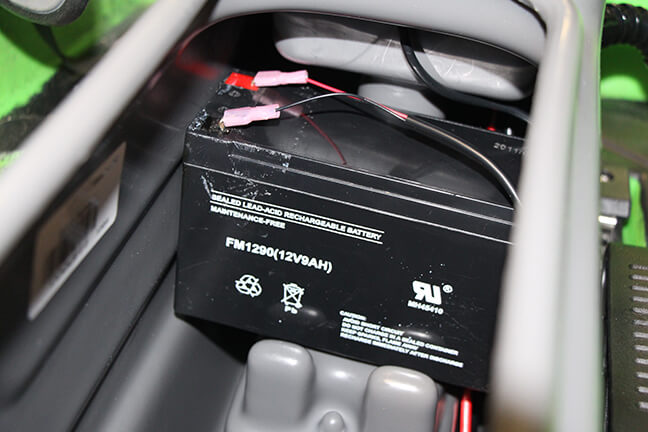
Next, let’s turn our attention to the power supply. Although the Predator XL Minn Kota has a 12V battery that powers the trolling motor, it is critically important that you connect your Humminbird HELIX power cable to a separate battery, dedicated only to your electronics. Doing so will minimize any potential electrical or radio frequency interference between the trolling motor and fishfinder. Fear not, however, as a small, lightweight, sealed lead acid battery, similar to those used for ice fishing sonar applications, will provide all of the power needed to drive the HELIX 7 for an extended adventure on the water. I recommend a 12 V, 9 or 10 Ah (Amp-hour) battery for this application. Conveniently, this battery sits on a shelf within the Minn Kota console, maximizing the available storage space within the console for other essentials like your lunch, sunscreen, phone, and camera to document your Predator adventures. Secure the battery in place using a product like Duo-Lock strips from 3M, or by pop-riveting a Velcro strap to the console’s shelf. Next, pass the HELIX 7’s power cable from the rigging channel into the battery compartment by removing the small black plug that separates the two areas. Connect the power cable to the battery, protecting the positive (red) wire with a 3 amp fuse.

A SMALL, 12V, SEALED LEAD ACID BATTERY, SITTING WITHIN THE MINN KOTA XL CONSOLE, POWERS THE HUMMINBIRD HELIX 7.
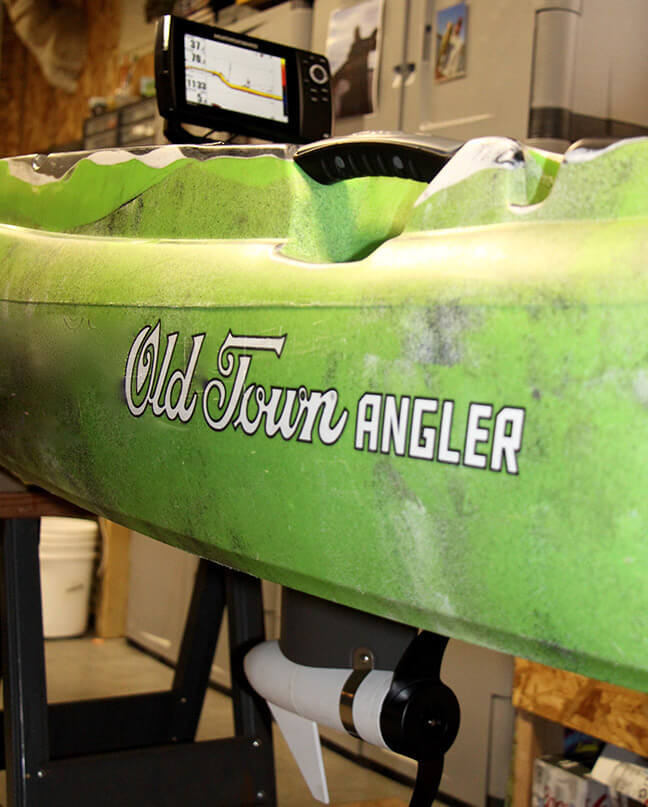
With the transducer and power supply in place, it’s time to finish the rigging process and install the HELIX 7 control head. Begin by passing the transducer and power cables out of the top of the rigging channel, capping the channel with the console’s custom-designed top mounting plate. This plate features two small notches, one for each of the HELIX 7’s cables, ensuring a clean “fit-and-finish” that will make your electronics installation the envy of your fishing club. Leave 12-16 inches of each cable exposed to complete the rigging process. I connected my fishfinder control head to the console’s top mounting plate using a RAM mount, which allows for easy removal of the HELIX for transport, and provides for maximum flexibility in positioning on the water. Plug the transducer and power cables into the back of the HELIX, and your electronics installation is complete.
Admit it: rigging the HELIX 7 didn’t take long at all. When you combine a powerful Humminbird HELIX 7 with the reliable, silent propulsion of the Minn Kota trolling motor and the feature-packed Old Town Predator XL Minn Kota command center, you have truly created the ultimate fishing machine.
Now, no smallmouth is safe, no redfish can rest. Go get ‘em!
