Kayak Fishing Navigation & Communication Tips
By: Matt Stone, Pro Staff
Have yak, will paddle. Kayaking seems pretty simple, and it is – Snag a kayak, plop it in the water, and head on out! The simplicity is why so many fall in love with kayaking and kayak fishing. It's low-maintenance, fun, peaceful, and sometimes exhilarating. However, just like you wouldn't drive a car without knowing how to use a blinker and read street signs, you should also be aware of some basics in kayak navigation and communication when heading out for a day on your favorite body of water. Oh, and if you don't use a blinker when driving, well, you're reading the wrong article!
LIGHTS FOR KAYAKING AND KAYAK FISHING
My Instagram handle is @SunriseKayakFishing, so it should come as no surprise that I love a good launch under the cover of darkness. Watching the honey-peach glow of false dawn creep above the horizon as it heats into a full blown electric orange sunrise fills my soul to its brim. If the goal is to launch before sunrise, or stay out after sunset for that matter, you'll want a basic knowledge of kayak and boat lights, to stay both safe and within the law.
Marine navigation law requires unpowered vessels under 23 feet in length to display, at minimum, a "white light" between sunset and sunrise or during periods of limited visibility, such as when a fog bank or heavy rainstorm roll through. Don't worry if your kayak doesn't have a battery, electrical wiring, or any of that jazz - a flashlight, headlamp, or phone light will work just fine. As long as it allows other boats to see you in time to avoid a collision, you're good to go! My favorite is a headlamp since it leaves my hands free. If I'm crossing busier waters and it's dark or I know boats are nearby, I'll also turn my phone's camera light on as a backup. If your kayak does have electrical wiring, many companies sell 360 white lights that are track or kayak mountable. One of my favorite parts of kayaks is that they are endlessly customizable, so whether going all in with a mounted 360 degree white light or paying $9 for a reasonably priced headlamp are both perfectly acceptable choices.
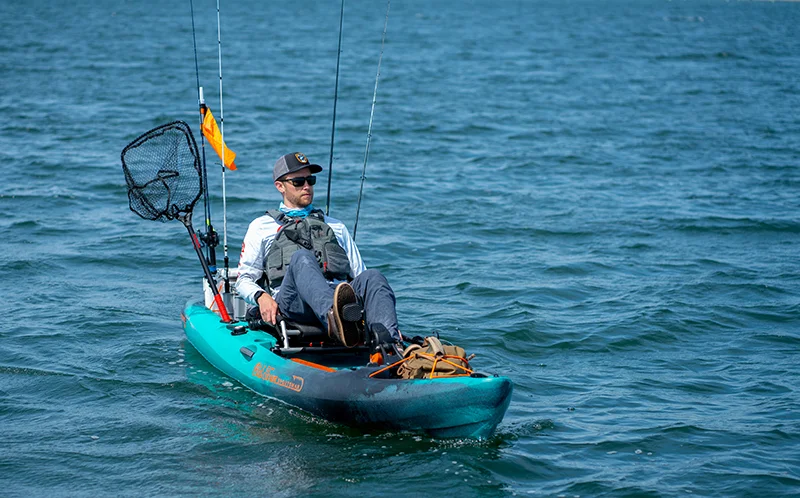
In most states, vessels under a certain length (16 feet in my home state of Connecticut) will need a sound-making device like a whistle or air horn. Last fall, a Coast Guard vessel came by when I was kayak-fishing for tautog in some local Long Island Sound waters. They wanted to know if I had a sound-making device. At first my stomach dropped - had I really forgotten this basic rule!? I reached down, and sure enough, my trusty whistle was still clipped to my PFD, right where I'd first attached it a few years back. The point here is, you may not need one of these devices for years at a time, but when you do need them they need to be nearby and easily accessible. In this case I needed them to fulfill the wishes of the very polite Coast Guard officer, but in another scenario I might have needed it right away to warn a boat of my presence. A whistle is about $3, required by law (check your state rule), and is a small but mighty way to ensure safe kayak navigation.
Kayakers should also have a basic knowledge of boat lights. When boats are present, which they often are, it helps to know what you're looking at. Red bow lights are on a boat's port (left) side, green bow lights are on a boat's starboard (right) side, and a white light will likely be seen from all angles, as it is usually on top of a boat or on its visible stern. If you're on the water and you see only red, that boat is moving right to left. If you see only green, the opposite is true: it's going left to right. If you see both, navigate with caution, as that boat is coming towards you and you'll want to discern its heading. If you only see white, the boat is probably heading away or moored, as you are likely looking at the stern or a mast light. Pretty straightforward, right? Memorization of this basic information makes kayak navigation a breeze, and in the end provides a safer, more enjoyable day on the water.
HOW TO USE CHANNEL MARKERS AND VISUAL LANDMARKS
You could walk into a boating course for 30 seconds, listen, and then immediately walk back out, and there's still a reasonably good chance you'd have heard the phrase "red right return". That quip is a day one lesson in boating and refers to using red and green channel markers when navigating to or from the ocean. Even in a kayak, and especially if you're fishing, you should know this rule. Broken down, it means that when returning from the ocean the red channel markers should be on your right, and thus the green markers are on your left. The opposite is true when heading out to sea: greens on the right, reds on the left. When fishing, these are often great places to troll, as the channels are typically dredged and their edges have nice, sharp drop-offs. They're highways for both boats and fish! While you certainly might not want to hang out in the channel in a kayak (those boat wakes...woof), this is still great knowledge to help understand the bottom topography and figure out where a boat is most likely to be. Not sure how to read bottom topography? Keep reading to learn about contour lines and bathymetric maps!
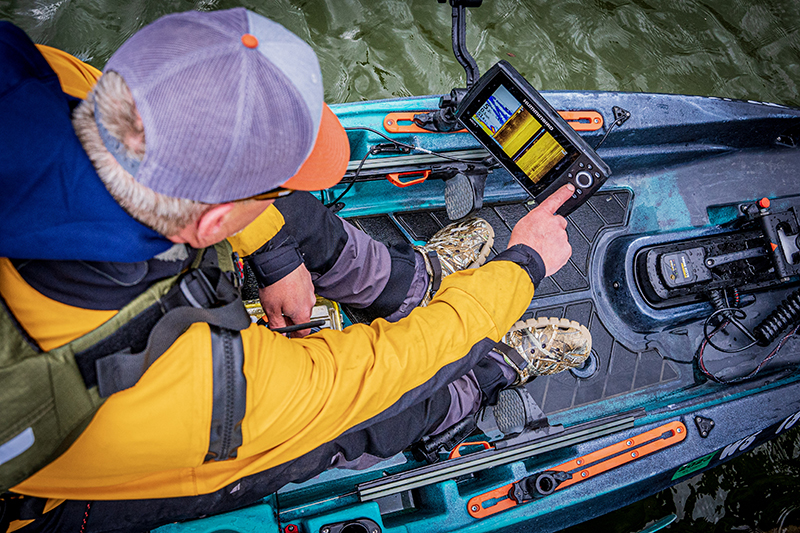
Landmarks are helpful in a variety of ways when exploring some new-to-you body of water. Essentially, they help keep a bearing so you don't end up like Tom Hanks in Cast Away. No one likes a volleyball that much. Choose a landmark when first heading out (a red house, a channel marker, an oddly-shaped rock, you get the idea) and use that as a home base, going only as far from it as is comfortable. If you're an advanced kayak fisherman and have a GPS-enabled fish-finder, perhaps one of the acclaimed Humminbird Helix, Solix, or Apex Series, then landmarks won't be as important, but you should still keep them in mind in case an unexpected battery failure strands you without those trusty electronics.
Landmarks can also be used when fishing, especially if a strong tide is in the mix. Try lining up two visible points, say the tip of a rock and a lighthouse, to make sure you're beginning a drift in the same spot if that area has been productive before. I subconsciously use landmarks like riffles, eddies, and pools to determine whether there is shallow water ahead, whether there are subsurface rocks to be aware of, or to help figure out where to cast.
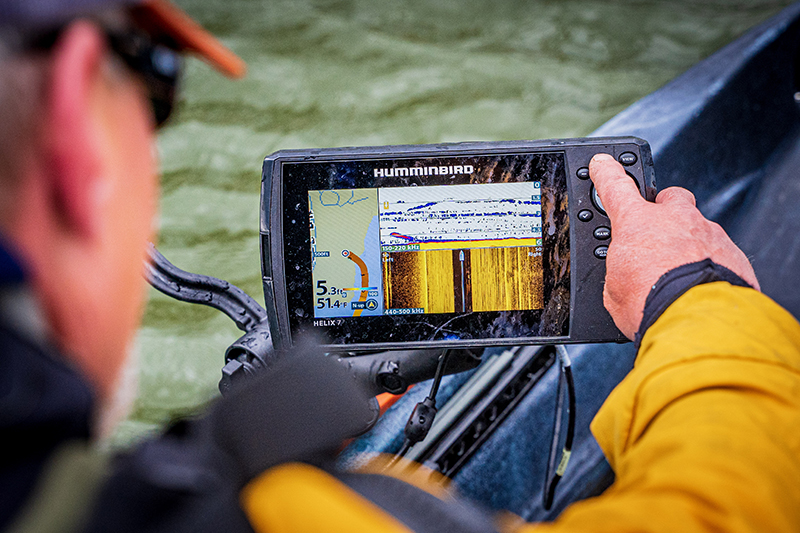
READING CONTOUR LINES FOR KAYAK FISHING
When looking at a bathymetric map, you'll want to know how to read contour lines. At the very least, understanding them will keep you away from dangerous or shallow structure, and at the most can be an incredibly valuable tool for targeting fish near naturally occurring underwater drop-offs, humps, and channels. Luckily, contour lines are quite simple. Really, they're a measure of height, but underwater: you're essentially looking at slopes, bumps, humps, and troughs on the bottom.
Lines on a contour map are used to represent points of equal depth. For example, a 20ft contour line traces an entire area of the bottom which is 20 feet deep. The shapes created by these lines let us know what the bottom looks like. A common occurrence: contour lines in ever-shrinking circles. That's a hole or a hump, whereas contour lines running parallel to one another are showing an ascending or descending slope. If contour lines are very closely packed together, that is a sharper slope, whereas contours which are spaced out are gently sloping. Spend some time looking at these maps (use the Navionics Web App for free practice) and, quite quickly, you'll get the hang of it. Eventually, building a mental rolodex of interesting bottom features will come in handy to quickly and effectively fish or navigate your home waters.
RADIO COMMUNICATION FOR KAYAK ANGLERS
If you plan on inshore kayaking, and want a bit of a safety-blanket while out paddling, a waterproof VHF radio is a great way to ensure a worry-free experience. They can be a bit pricey, but how much are you willing to pay for safety and quick access to potentially life-saving help? I'd pay quite a bit for that.
VHF radios come with many channels, but just like a TV some are used or listened to much more than others. Channel 16 is used for distress and safety calls, while Channel 9 is a supplementary channel used to make contact with a vessel from shore or from another vessel. I like to stay tuned to Channel 16, as that is where the Coast Guard announces weather warnings, urgent messages (like a lost boater), or navigation obstructions like trees or logs, which can be as dangerous for kayakers as they are for boaters, depending on the body of water you're on.
VHF radios can be a fun way to keep in touch with friends as well. Typically, a fishing buddy and I will pick a random channel to chat on, and give each other updates on how the fish are biting when there's some distance between us. There's fun banter to be had as well, as long as it's not being done on one of the safety or Coast Guard established communication channels. Overall, VHF radios are an added layer of protection which make communication, navigation, and your day as a whole even better.
Navigating and communicating while on a kayak is very simple. Possessing a few key bits of knowledge immediately makes you a safer kayaker and able to enjoy time on the water even more. The more knowledge you have of the items discussed here, the better. Take some time to add a few of these pieces of information to your repertoire. You won't regret it!


