Installing a Minn Kota Heading Sensor on a Sportsman AutoPilot Kayak
Old Town's innovative AutoPilot kayaks built around Minn Kota's I-Pilot Powerdrive motor have opened up countless opportunities for kayak anglers. With integrated GPS this I-Pilot motor provides a variety of built-in features including cruise control and can even pilot the kayak on a set heading or along saved tracks. One of the most popular features of the I-Pilot motor is its Spot-Lock capabilities. With the push of a button, a kayak angler can hold a position in current or wind plus or minus a few feet. However, kayak anglers can up their Spot-Lock game with the addition of a Minn Kota Bluetooth Heading Sensor.
Watch the following video for an overview of the functionality and installation procedure for the Minn Kota Bluetooth Heading Sensor:
What is a Heading Sensor and What Does It Do?
The heading sensor is a 3" white puck that contains a compass. The compass communicates with the motor on your AutoPilot kayak allowing it to determine its heading and enabling the Spot-Lock Jog feature. Spot-Lock Jog allows you to move in 5-foot increments in any chosen direction while in spot-lock. Using the up/down and left/right arrow keys on the I-Pilot remote kayak anglers can precisely guide their kayak into the best Spot-Lock position for targeting areas where fish are holding. Spot-Lock jogs of greater distance, in 5' increments, can be made simply by hitting one of the arrow keys more than once. For example, hitting the up arrow key twice would result in a jog forward of 10' whereas hitting the left key three times would result in 15' of movement to the left.
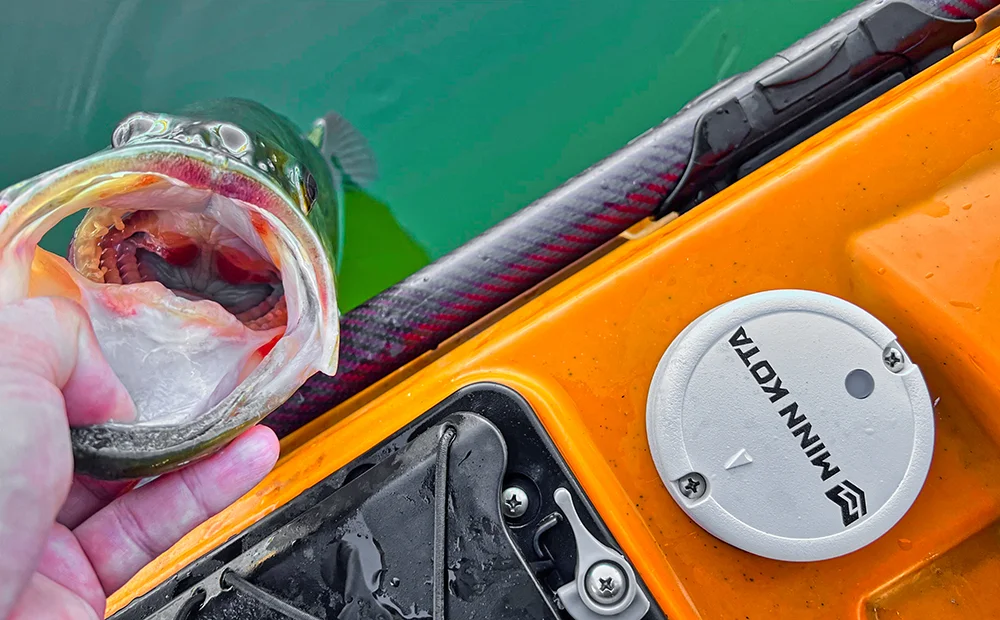
Heading Sensor Installation
The heading sensor can be installed near the bow, adjacent to the seat, or on the stern of your AutoPilot kayak. Be sure to avoid any ferrous materials that may impact the compass. Start by drilling a ¼" hole to run the power cable through, orient the sensor with the arrow pointing towards the bow, and secure it with the included screws. You may want to add silicone around the holes to prevent water from getting inside the hull. The sensor is powered by a 12-volt system and can easily be tied into the same battery system that powers your fish finder.
Pairing and Calibrating Your Heading Sensor
Verify that your heading sensor is powered up. A blue light should illuminate the top for 3 seconds. To pair your heading sensor with your motor, depress the silicone "Pairing" button that is illuminated blue on powerup. When it illuminates quickly press the pairing button on the top of your motor. The motor will emit a beeping pattern when paired.
Next motor your kayak out to an area away from boats and any obstructions to complete calibration. On your I-Pilot navigate to the Systems menu and navigate to "Sensor Cal" and press Okay. Follow the on-screen instructions that will have you drive in two complete circles. After you have completed calibration you can now use the Spot-Lock Jog feature!
The Spot-Lock Jog feature is perfect for kayak anglers who spend a lot of time using Spot-Lock and fishing tight to structure. Additionally, it makes it possible to systematically work an entire area methodically with just the simple push of a button. You can find Heading Sensors available online and at your local marine and boating shop.


